So I moved one of my work machines home and since i don't really need any of the windows applications i permanently switched over to the Ubuntu installation(was a dual boot setup).
Now a few months later i need some extra space for my Steam games. So decided to install them on the old windows partition. Those of you who are in the same boat already know that NTFS partitions(or most non ext4 partitions) don't auto mount.. so heres a culmination of my figuring out how to do that..
..and get Steam to use the NTFS partition as the directory for downloading and installing games.
I believe that this can also be used to mount external hard drives.. though you'll need to leave them plugged in at all times to avoid problems.
Note: The instructions below was culled from several forum posts, which will be mentioned and linked at the end.
1) Hit Ctrl – Alt – T on your keyboard to open Terminal. When terminal opens, run the commands below to view all partitions on your system. The drive should already be attached to your Ubuntu machine.
you should see something like thissudo blkid
in my case I need to automount the two NTFS drives named "ReactorCore" and "Rehoboth" so from now on wherever you see those names, replace them with your drive labels
2) You need to note down the UUID(Drive Id)
in my case its 10B062CCB062B83C for Reactorcore and 7E02626002621E01 for Rehoboth
(you can drag to select and copy it out of the terminal and into a notepad or wherever)
3) Go back to the Terminal and run
this opens the fstab file.sudo gedit /etc/fstab
which should look like this without any entries for your ntfs partitions
Scroll to the bottom and add the following entries for your drives
UUID=10B062CCB062B83C /mnt/reactor ntfs-3g defaults,locale=en_US.utf8 0 0
Note: the UUID is what tells linux which drive to mount, and the name "reactor" is the name it will show up under.. it can be anything you like.
So my fstab file now looks like this:
5) After that, run the commands below to create the mount point you specified in the fstab file.
sudo mkdir /mnt/reactor
In my case i did this again for the second drive "rehoboth" as well
6) Make yourself "owner" of the mount point by running the commands below
sudo chown chaitanyak /mnt/reactor
Replace "chaitanyak" with your username, and "reactor" with your mount name
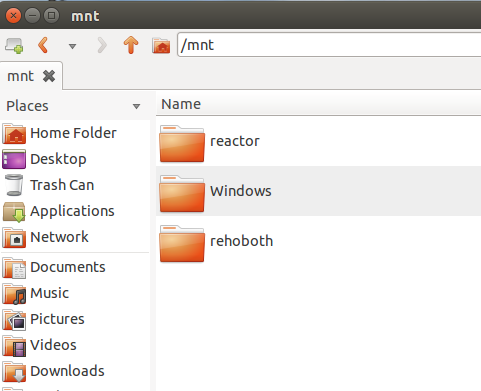
7) Restart your computer and go to /mnt to access the drives.

you can drag them to the side panel to create bookmarks for easier access
8) Launch Steam, in the top menu click "steam" and go to settings
now on the side menu click "downloads"
and you'll see the "Steam Library Folders" button
Click it
9) now you see this.. a list of the folders on various drives.. in your case it will probably just be the first one..
click the "Add Library Folder" to add one of your newly added drives..
which will show up under "mnt" as seen below
that creates the folder.. now back in the folder list, you can right click and set it as the default one.
Thats it! happy gaming!
Refrence links:
http://steamcommunity.com/app/440/discussions/0/864969482000076486/
http://www.liberiangeek.net/2012/04/auto-mount-windows-ntfs-partitions-in-ubuntu-12-04-precise-pangolin/
http://steamcommunity.com/app/221410/discussions/0/864969481983128260/
http://askubuntu.com/questions/226884/how-do-i-use-a-different-drive-as-an-installation-location-for-steam


No comments:
Post a Comment