
I tried jumping out of the headset, going to the desktop and freeing up space on C: drive (where Tiltbrush saves projects and exports by default).. but when I jumped back into VR I still couldnt save anything. So I had to bid adios to that excellent Eva of which I now have no record(the one above was made a few minutes later.. and is not as mean looking).
Then after a bit of googling I realised that not much has been written about this problem. So here you go. Your welcome.
The Problem:
Tiltbrush saves projects and exports into the default "Documents" folder on your C: drive.. and theres no option anywhere to change that. If your like me your C: drive will routinely run low on memory due to various design/editing software generating temporary files. A good practice is to go and purge these.. but a simpler solution for Tiltbrush users is to just move the save location for Tiltbrush files to a partition that just has a ton of space.
The Solution:
Move the default "Documents" folder itself, while leaving it mapped in the Windows environment so that any program such as Tiltbrush that uses these default folders can still use them.. theyre just not on C: drive anymore.
Heres how:
- Open an explorer window, you should see the documents folder either in the main window or on the side bar.
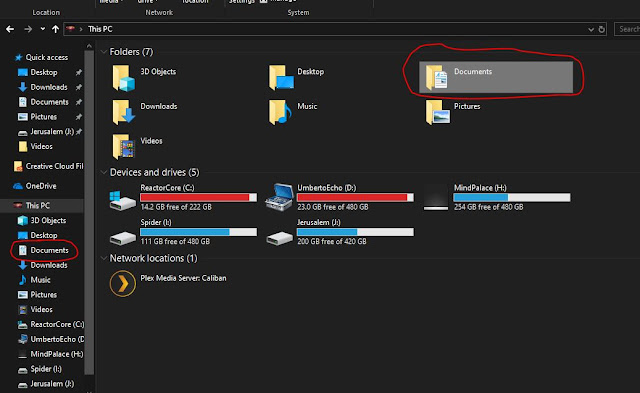
- Right-click the folder and select “Properties”
- Click the tab “Location”
- The dialog box shows up asking if you want to "restore default" , "move" or "find target"
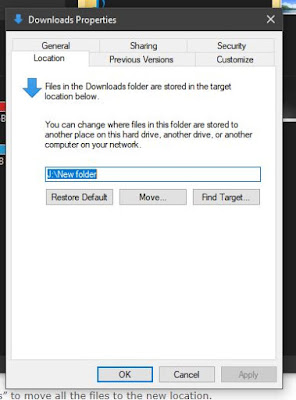


- Click “Move”
- An Explorer dialog “Select a destination” will open
- Browse to the location where you want to redirect this folder. You can select another location on this computer.
- Click the folder where you want to store the files (not the root of a drive, make a folder)
- Click the button “Select Folder”
- Click “OK”
- In the dialog that appears, click “Yes” to move all the files to the new location.
- After you press apply wait for it to do a copy.. before you do any heavy tasks.. theres no progress bar.. just the "wait" spinner icon. Once the copy is done, it will close this window.
- Open Tiltbrush and all files will now be stored at the new location.
No comments:
Post a Comment